A parent-child ticket setup is needed in an event when there is a need to facilitate buying of a ticket[T2] unless you buy another ticket [T1]. In order to facilitate this, it is advised to make a parent-child relationship between T1 and T2 where the ticket T1 becomes the parent to ticket T2.
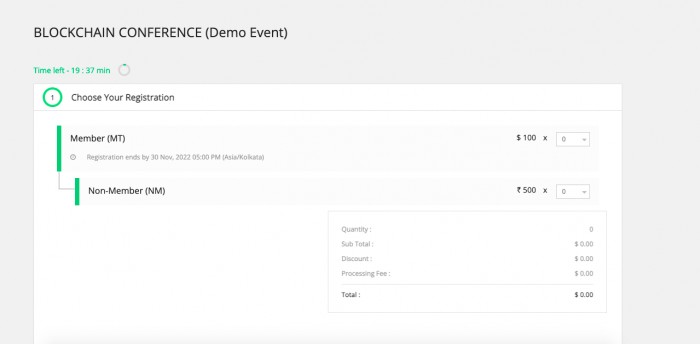
Let's take the case of an event which is a Member-only event and there is a member ticket [Mt] and there is a Member validation against this ticket. This means, only a member can buy this ticket. But if you wish to allow the Member to buy another ticket for his friend/family/Guest who are a non-Member then a Guest ticket should be created and for this Guest ticket which is essentially a non-Member ticket, select the Member ticket[Mt] as its parent.
The advantage of this setup is that a non-member can't buy this ticket independently. This means, if a non-Member tries to visit the event checkout page, he/she can't see this ticket even if it is a non-Member ticket. The reason; it is tied to the Parent ticket which is a Member ticket.
How does the ticket display look on the event checkout page:

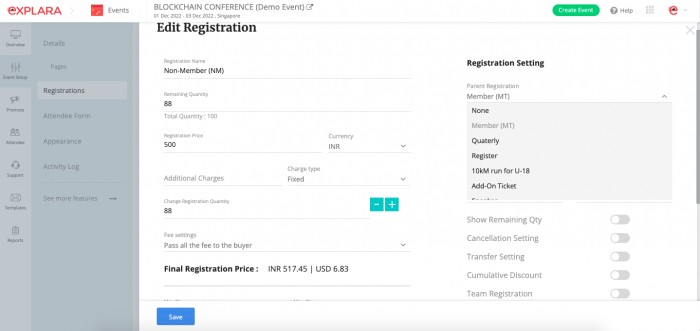
How to set up the Parent-Child relationship for a ticket.
1. Create a Member ticket [Mt]
2. Create a Non-member ticket [Nm]
3. For the ticket Nm, go to the ticket setting . In the ticket setting panel, there is a setting attribute named "Select Parent"
4. Under this setting, you will see the list of all the tickets that you have created. Select the Member ticket [Mt] as the parent to the Child ticket Nm and save it.
